Sometimes its desired to get long exposure time to blur everything moving or you need to get exposure time up to allow for use wider apertures in bright light. To control exposure one can use neutral density filter, or ND filters. They cost from a few bucks on eBay to more than $100. I wanted to play a little with ND filters to learn more about photography techniques. To start off I ordered a couple of Green L filter for less than $6 each from eBay. For that price I weren’t expecting the best quality.This is a preliminary first test of the filters. Not great photographic work. I just put up my tripod when I had an opportunity and fired away some test shots. I also shot with a couple of polarizing filters for comparison. The filters tested was:
- Hama linear polarizing M72
- Hoya 77 super circular polarizing 77mm
- Green L ND4
- Green L ND8
Step-up rings were used to attach the polarizing filters. Camera was a Canon 600D with a Tamron 17-50 F2.8 lens. All shots at F11 and evaluative light measuring with a +2/3 exposure correction. Raw developed with default settings in Aftershot without any auto levels or other adjustments.
- No filter
- Hoya super cir pol 77mm
- Hama PL linear M72
- Green L ND4 67mm
- Green L ND8 67mm
- Green L ND4+ND8
This is not a very scientific test, but it gives a small clue about the performance of the filters. The light metering in the 600D did not produce constant exposures times of this scene. There where some variation. Also it seems to underexpose more the more the denser the filters got.
All the filters except the Hoya produced some flare. The Hama filter was as it says in the case equal to an ND4 filter in terms of density. The Green L ND4 filter had a little colour shift towards red/green that could need a little correction in post processing. The ND8 filter was even worse to the point that it seems like its no easy task to correct in post processing. Stacking both the ND4 and ND8 filters produced a strong red shift to the point that the combination is useless for anything else than black and white photography.
While the Green L filters has some colour shift problems they will become a part of my photographic toolkit for now. If end up needing ND filters more often I’ll probably upgrade them sometime in the future. All in all they perform well for filters at under $6 each!
Edit:
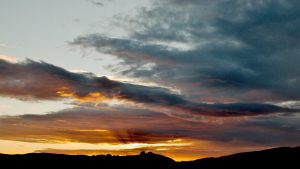
Just an update on this post with another test photo. This time only with the Green L ND8 but with a more classic ND filter use. Unfortunately my QR-plate for my tripod was still attached to my 70-200 at home, so I didn’t take more than a few shots holding the camera to the tripod. Photo post processed and colour corrected as good as I managed in a fair amount of time.
Here is what I’ve done to the colours in AfterShot:
Additional testing.
Yesterday I went for a walk and took a couple of test more. This time I combined the two polarisation filters. A linear and a circular polarisation filter stacked behaves (and probably is the same) as a variable ND filter. This way it’s easy to get much longer exposures. This time I had to handhold the circular filter in front of the linear. This combination preserved colours much better than the dedicated cheap ND filters and also give me longer exposures if I want.
Here no color adjustments is done. Colours are boosted because of the double polarisation filters. Exposure is 2.5 s at F10 ISO 100.
Pingback: Green 72mm Nd4 Neutral Density Filter